Quick Summary
Your car likely needs paint correction if you see swirl marks, fine scratches, oxidation, water spots or etching, or reduced gloss in direct sunlight. Paint correction levels the clear coat by removing a thin layer, so it fixes surface defects but not deep scratches or peeling clear coat.
- Inspect paint in shade or overcast light with a handheld LED at a 10 to 20 degree angle.
- Correction cannot fix deep scratches, peeling clear coat, rock chips, or dents.
- Repeated correction can thin the clear coat until it burns through, so check thickness first.
- Correct before a ceramic coating, since the coating locks in any swirls or oxidation underneath.
- Use the fingernail test: if the nail glides over a scratch, it is likely correctable.
Table of Contents
- What Paint Correction Actually Does (and Doesn’t)
- How to Inspect Your Car’s Paint Safely and Consistently
- Sign 1: Swirl Marks and Spider-Webbing
- Sign 2: Fine Scratches and Light Paint Defects
- Sign 3: Oxidation, Fading, and a Dull or Hazy Finish
- Sign 4: Water Spots, Mineral Etching, and Holograms
- Sign 5: Reduced Gloss and Clarity in Direct Sunlight
- Paint Correction Cost and Whether to Correct Before Ceramic Coating
- Frequently Asked Questions
What Paint Correction Actually Does (and Doesn’t)
Last Updated: November 7, 2026
Paint correction is the process of removing a thin layer of clear coat to level out defects like swirl marks, light scratches, and oxidation. A skilled technician uses a machine polisher, pads, and abrasive compounds to smooth the surface until light reflects evenly. Done well, it can bring back depth and gloss that years of washing and sun exposure have taken away.
Here’s what most people miss: correction removes the top layer of paint, not the defect itself. The clear coat is a thin, finite layer, and every pass takes a little off. That’s why a good technician measures and works carefully rather than grinding away until things look shiny.
Correction can fix:
- Swirl marks and spider-webbing from washing and drying
- Fine scratches that sit within the clear coat
- Oxidation and faded, chalky paint in the top layer
- Light water spots and surface haze
Correction cannot fix:
- Deep scratches that have gone through the clear coat into the base color or primer
- Peeling or failing clear coat, which needs repainting or a panel replacement
- Rock chips and dents, which need body work
- Paint that has already been thinned by previous over-correction
Watch out: Repeated correction over the years can thin the clear coat until it burns through. Ask whether the paint thickness has been checked before anyone starts a multi-step job.
How to Inspect Your Car’s Paint Safely and Consistently
Most owners inspect paint by glancing at it in the driveway on a sunny afternoon. That is the least reliable way to do it. Harsh overhead sun washes out fine defects, and a dirty panel hides the rest. A consistent inspection takes about 15 minutes and gives you a baseline you can compare against later.
What you need:
- A clean, dry car. Wash it yourself with a pH-neutral car wash soap and dry with a clean microfiber towel, or use a touchless wash and hand-dry. Do not inspect a dusty panel.
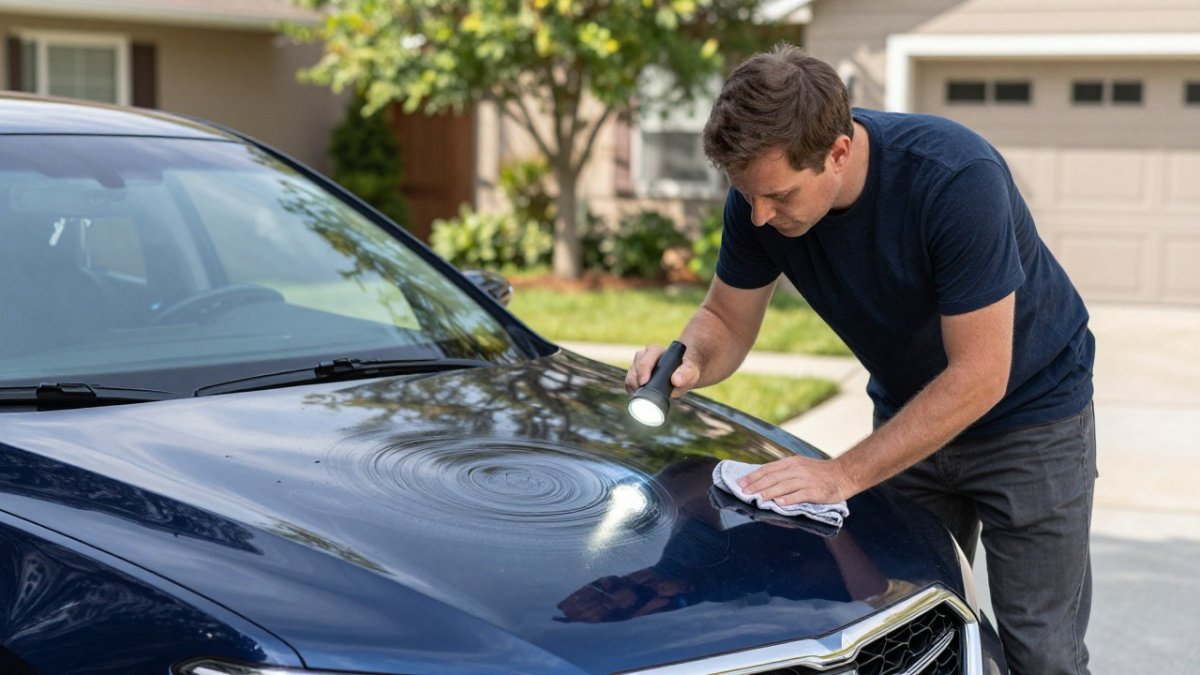
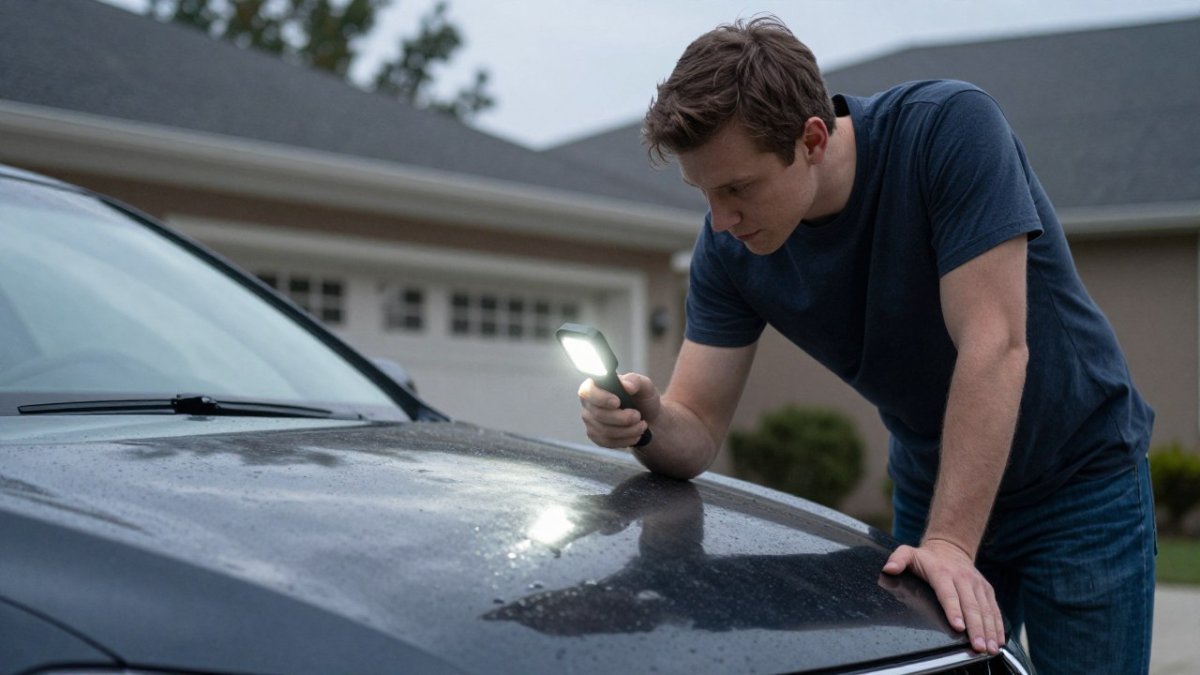
- A bright, directional light. A handheld LED flashlight or a detailing inspection light works. Hold it at a low angle, roughly 10 to 20 degrees off the panel surface, and sweep it across the paint.
- Shade or an overcast day. Direct midday sun is fine for spotting swirls, but shade plus a handheld light is more consistent and easier to repeat.
- A clean microfiber towel for wiping the light across the panel, not your hand.
The inspection routine:
- Work panel by panel: hood, front fenders, doors, roof, trunk, rear bumper. Do not try to judge the whole car at once.
- For each panel, view it from three angles: straight on, at a low angle with the light sweeping across, and at a 45-degree angle from the side.
- Note what you see and where. A phone photo with the light in frame is enough to track changes over months.
- Grade each defect as light (visible only under the light), moderate (visible in shade), or deep (visible in daylight and catches a fingernail).
Watch out: Do not run your bare hand across a dirty panel to feel for defects. Grit on the surface can drag and add scratches. Wipe with a clean microfiber towel first, and use the towel, not your fingers, to feel for roughness.
What each defect looks like under the light:
- Swirl marks: fine circular lines that appear as a spider-web pattern when the light sweeps across.
- Fine scratches: thin, straight lines that catch the light briefly as you move the beam.
- Oxidation: a chalky, hazy look that scatters the light instead of reflecting it.
- Water spots: ring-shaped mineral deposits that sit on the surface or etch into it.
- Holograms: rainbow or circular buffer trails left by machine polishing.
Do the inspection in the same spot, with the same light, at the same time of day each time. That consistency is what makes it useful for deciding whether correction is needed and for judging the result afterward.
!A vehicle owner in a driveway under overcast daylight, inspecting a dark car’s hood at a low angle with a handheld LED light
Sign 1: Swirl Marks and Spider-Webbing
Swirl marks are the most common sign that your car needs paint correction. They look like fine circular scratches that show up in sunlight, and spider-webbing looks like a web of tiny lines across dark paint.
Most swirl marks come from washing with dirty towels, dry wiping, or automatic car washes with brushes. Each wash adds a few microscopic scratches, and they build up.
Quick check: If the swirls only show up in direct light and disappear when you wipe the panel, they may just be surface dust. If they stay visible after a proper wash and dry, correction is likely needed.
Swirl marks are one of the best cases for correction, since they sit in the top layer of clear coat and polish out well.
Sign 2: Fine Scratches and Light Paint Defects
Fine scratches are thin lines that catch the light. They often come from keys, branches, car wash brushes, or someone brushing past a panel.
Your fingernail is a useful test. If your nail glides across the scratch without catching, it’s likely in the clear coat and can be corrected. If your nail catches, the scratch is probably deeper and may need more than polishing.
Light defects like these respond well to a one-step correction, which uses a single polish or compound pass. Heavier defects usually need a multi-step process.
Sign 3: Oxidation, Fading, and a Dull or Hazy Finish
Oxidation happens when UV rays break down the clear coat. The paint looks chalky, faded, or hazy, and it often feels rough when you touch it.
A common mistake is assuming a dull finish just needs a wax. Wax sits on top and can hide oxidation for a few weeks, but the damage stays underneath. Correction removes the oxidized layer so the new shine lasts.
Watch out: Heavily oxidized paint can be thin. Check the clear coat before committing to aggressive work, because a hard compound pass can take too much.
Sign 4: Water Spots, Mineral Etching, and Holograms
These three defects look similar in photos but behave very differently under a polisher. Knowing which one you have determines whether correction is safe, effective, or a waste of clear coat.
Water spots form when hard water dries on the paint and leaves calcium and mineral deposits behind. Fresh spots are usually on the surface and come off with a wash or a dedicated water-spot remover.
Mineral etching is the advanced stage. The minerals have eaten a shallow crater into the clear coat. Light etching often polishes out with a fine compound. Deep etching may leave a faint texture even after correction, because removing the full crater would take too much clear coat.
Holograms and buffer trails are different. They are not environmental damage; they are tool marks left by a machine polisher used with the wrong pad, compound, or speed, or moved too fast across the panel. They look like rainbow arcs or circular trails in direct light.
How to tell them apart:
- Water spots: ring-shaped, often clustered where water pooled, and worse on horizontal panels like the hood and roof.
- Etching: rough to the touch after washing, with a visible edge under a low-angle light.
- Holograms: rainbow or circular patterns that follow the path of a polisher, not the shape of a water drop.
Watch out: Do not assume every spot is fixable. If a water spot or etched ring is deep enough to catch a fingernail, the clear coat may be too thin to polish it out safely, and a technician should measure paint thickness before attempting correction.
If you see etching, a one-step polish often removes light cases. Deep etching and holograms from a previous bad polish usually call for a multi-step correction with a measured approach, and sometimes the honest answer is that the paint should be protected rather than corrected further.
Sign 5: Reduced Gloss and Clarity in Direct Sunlight
Gloss is the depth and sharpness of your reflection. When the clear coat is worn, reflections look blurry, and the color can seem flat even when the car is clean.
Try this: park in direct sunlight and look at the reflection of a straight object, like a building edge or a fence. If the line looks wavy or soft, the surface has lost clarity. Correction restores that sharp reflection by leveling the surface.
Reduced gloss often comes with other signs on this list. If you see several of them together, correction is usually worth considering.
Paint Correction Cost and Whether to Correct Before Ceramic Coating
Many owners ask whether they should correct their paint before adding a ceramic coating. The short answer is yes, in most cases. A coating bonds to the surface, so any swirls or oxidation underneath stay visible and get locked in. Correcting first gives the coating a smooth base to protect.
Paint correction cost depends on the condition of the paint, the vehicle size, and how many steps are needed. Pricing depends on the vehicle, the condition of the paint, and how many steps the job requires, so the best next step is to visit the Blue Ridge Mobile Detailing website for current prices or a quote based on your specific vehicle.
If you’re ready to see what correction can do for your paint, book a mobile paint correction session and we’ll come to your driveway, or read our breakdown of what correction removes and what it can’t before you decide.
Here is a quick reference for the pricing and coating points covered in this section.
| Item | Value | Note |
|---|---|---|
| Inspection time | About 15 minutes | Gives a baseline for later comparison |
| Inspection angles per panel | 3 | Straight on, low angle, and 45 degrees from the side |
| Correction before coating | Yes, in most cases | Coating locks in swirls and oxidation underneath |
| Cost driver | Paint condition | Also vehicle size and number of steps needed |
| Pricing source | Blue Ridge Mobile Detailing website | Current prices or a quote for your vehicle |
Frequently Asked Questions
How do I know if my car needs paint correction?
Look at the paint in direct sunlight and at an angle under a bright light. If you see swirl marks, fine scratches, haze, or a loss of reflection that washing does not remove, the paint likely needs correction. A simple test is to wash and dry a small panel, then inspect it under a focused light source. Defects that remain after a clean wash are the ones polishing can address. Consistent inspection each season helps you track whether the finish is declining over time.
Can paint correction remove swirl marks and light scratches?
Yes, in most cases. Swirl marks and light scratches sit within the clear coat, and machine polishing with the right pad and compound levels the surface to remove them. Deeper scratches that catch a fingernail may only be reduced, not eliminated, and very deep scratches that reach the primer or bare metal usually require touch-up or repainting. A professional inspection can confirm which category your defects fall into before any work begins.
Does a new car need paint correction before ceramic coating?
Often, yes. Ceramic coating bonds to the existing clear coat and locks in whatever condition the paint is in when it is applied. If swirl marks, scratches, or etching are present, the coating will preserve them and they will remain visible under the coating. Paint correction before ceramic coating removes those defects first, so the coating protects a clean, corrected surface and gloss is maximized.
How much does a paint correction cost?
Pricing depends on the vehicle’s size, the severity of the defects, and whether a single-step or multi-step correction is needed. Heavily marred paint typically requires more time and more stages than lightly swirled paint. For an accurate figure based on your vehicle and paint condition, request a quote from Blue Ridge Mobile Detailing through the website, where current pricing is listed and an inspection can be scheduled.