Last Updated: November 4, 2026
Quick Summary
Clear coat failure is the breakdown of the protective top layer itself, showing as cloudy haze, patchy dullness, or peeling that stays fixed when you change your viewing angle. Swirl marks are fine circular scratches sitting on the surface that shift and move as the light angle changes. A test spot confirms which one you have.
- Swirl marks look like tight spiderwebbing that shifts as you change your viewing angle.
- Clear coat failure feels rough, gritty, or sandpaper-like compared to smooth swirl marks.
- Use diffuse, direct, and raking light to inspect paint before judging any defect.
- If a defect stays exactly the same after a test spot polish, suspect clear coat failure.
- Polishing over failing clear coat can lift flakes and make peeling worse.
Table of Contents
- What Swirl Marks and Clear Coat Failure Look Like Under Direct Light
- Clear Coat Failure Signs: Peeling, Cloudy Haze, and Patchy Dullness
- How to Inspect Car Paint Under Lighting: A Step-by-Step Diagnostic
- Ruling Out Look-Alike Defects: Water Spots, Etching, and Holograms
- The Polishability Decision Tree: When Correction Works and When It Doesn’t
- How to Remove Swirl Marks from Car Paint Without Damaging the Finish
- Can Clear Coat Failure Be Repaired? Repair Options and Safety Limits
- Schedule a Professional Paint Inspection with Blue Ridge Mobile Detailing
- Frequently Asked Questions
What Swirl Marks and Clear Coat Failure Look Like Under Direct Light
Swirl marks are fine circular scratches in the top layer of automotive paint. Clear coat failure is the breakdown of that protective top layer itself.
Here is the fastest way to tell them apart. Swirl marks sit on the surface. Clear coat failure sits in the surface.
Knowing how to identify clear coat failure vs swirl marks saves owners from paying for polishing that cannot fix a coating problem.
Under direct sunlight or a strong inspection light, swirl marks appear as tight spiderwebbing. They look like a spider web of fine scratches that shift and move as you change your viewing angle. The paint around them still looks glossy.
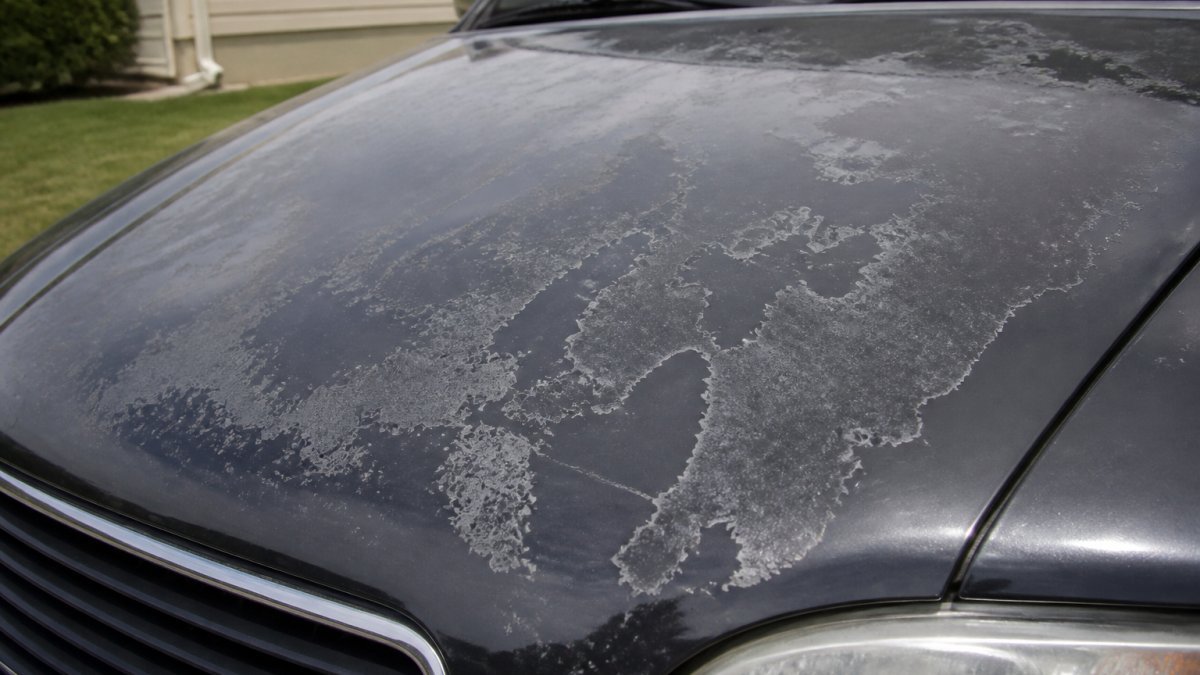
Clear coat failure looks different. It shows as a cloudy haze, patchy dullness, or a chalky white film that does not move when you shift your angle. In advanced cases, the top layer peels or flakes.
| Feature | Swirl Marks | Clear Coat Failure |
|---|---|---|
| Location | Surface scratches | Damage inside the coating |
| Look under light | Circular spiderwebbing | Cloudy haze, patchy dullness |
| Movement with angle | Shifts and changes | Stays fixed |
| Texture | Smooth to the touch | Rough, gritty, or sandpaper-like |
| Fix | Polishing and paint correction | Repaint or respray |
Clear Coat Failure Signs: Peeling, Cloudy Haze, and Patchy Dullness
The clearest clear coat failure signs show up as changes to the coating itself, not just the surface. Watch for peeling, a cloudy haze, and patchy dullness that will not polish out.
Peeling is the most obvious sign. You may see small flakes lifting at panel edges, along the hood, or on the roof. Once peeling starts, the damage has moved past the surface.
Cloudy haze is subtler. The paint looks milky or washed out in certain spots, even after a wash. Patchy dullness follows the same pattern. Some areas look bright while others look flat and gray.
Other signs to check for:
- Yellowing or browning in the coating
- A rough, gritty texture that feels like sandpaper
- Ghosting, where the base color starts to show through
- Small blisters or bubbles under the surface
- Delamination, where the top layer separates from the color coat
A common mistake is treating these signs as dirt or oxidation. If a spot stays dull after washing and light polishing, suspect clear coat failure, not surface grime.
How to Inspect Car Paint Under Lighting: A Step-by-Step Diagnostic
Learning how to inspect car paint under lighting comes down to one rule: control the light before you judge the paint.
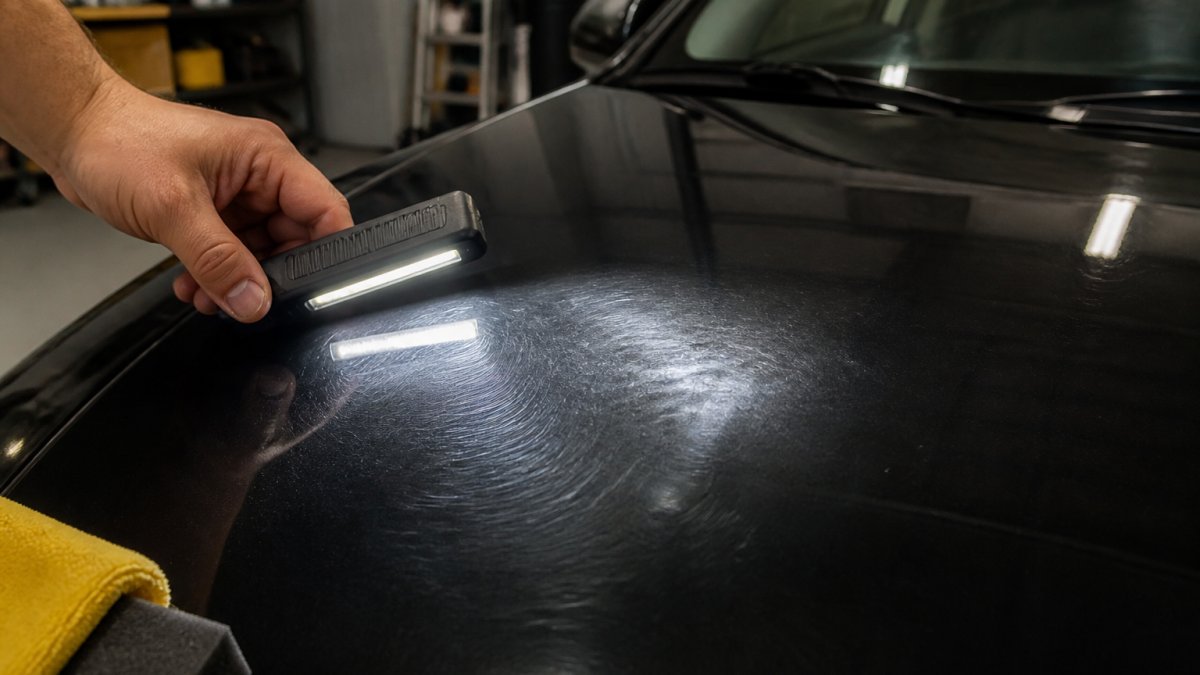
Set up three lighting conditions before you inspect anything:
- Diffuse light: Open shade, an overcast sky, or a white LED work light bounced off a white wall. Diffuse light shows overall gloss, haze, and color uniformity without glare.
- Direct light: A bright LED inspection light or phone flashlight held close to the panel. Direct light reveals dullness, chalky film, and texture.
- Raking light: The same light held at a low angle, almost parallel to the surface. Raking light is the best test for fine circular scratches and surface marring.
Follow these steps in order:
- Wash and dry the panel first. Dirt and water spots hide defects and can be mistaken for coating damage.
- Work in shade so sunlight does not wash out the defect.
- Start with diffuse light and note any patchy dullness, milky haze, or color shift.
- Switch to raking light and sweep the beam slowly across the panel from several directions.
- Watch whether the defect pattern moves as you change the light angle or your viewing position.
- Switch to direct light and check the same area for haze, yellowing, or texture.
- Feel the area with a clean fingertip or through a thin plastic bag to compare smooth versus gritty texture.
- Photograph each defect under the same light and angle so you can compare panels later.
Light angle matters more than brightness. A low, raking light reveals fine scratches and surface marring. A high, direct light shows haze and dullness. Use both to compare the same spot.
Surface scratches shift as you move the light. Coating damage stays put. That single difference separates the two defects in most cases.
Watch out: inspecting a hot panel in direct sun can make even healthy clear coat look hazy, so let the paint cool and confirm any finding in shade before you draw a conclusion.
Once you have a suspect area, mark it with painter’s tape and run a test spot before recommending any correction.
Ruling Out Look-Alike Defects: Water Spots, Etching, and Holograms
Not every defect is a swirl mark or coating failure. Water spots, etching, and holograms mimic both and lead owners to the wrong fix.
Water spots are mineral deposits left on the paint after water evaporates. They sit on top and often wipe away with a proper wash. Some leave a faint ring that needs light polishing.
Etching happens when acidic contamination, like bird droppings or hard water, eats into the coating. It looks like a dull crater or a raised ring.
Holograms are buffer trails left by poor machine polishing. They look like a ghostly, three-dimensional pattern that shifts with the light. Holograms are surface-level and correctable.
To rule these out, wash the panel, then check under raking light. If the mark disappears with a wash, it was surface contamination. If it stays and feels rough, it is etching or coating damage.
The Polishability Decision Tree: When Correction Works and When It Doesn’t
Paint correction only works when the defect sits above the base coat and enough clear coat remains to polish safely. Use this decision tree before you touch a polisher, and confirm every branch with a test spot rather than a guess.
Step 1: Run a test spot. Choose an inconspicuous area, such as the lower edge of a door or the underside of the hood.
Step 2: Interpret the result.
- The defect fades or disappears: It was surface-level marring, such as swirl marks or light holograms. Correction can work, and you can plan a full polish.
- The defect improves but does not clear: It is deeper than surface marring, such as etching or a deep scratch. Measure clear coat thickness before going further.
- The defect stays exactly the same: Suspect clear coat failure or damage below the coating. Polishing will not fix it.
- The surface feels rougher, lifts, or flakes after the pass: Coating failure is confirmed. Stop immediately.
Step 3: Check the hard limits. Clear coat thickness is the hard limit. Every polish removes a small amount of coating, and on a thin or already-failed layer polishing makes things worse.
Step 4: Apply the stop rules.
- Stop if the test spot reveals peeling, flaking, or delamination.
- Stop if the paint looks chalky or milky after polishing.
- Stop if you can see a color change or primer through the coating.
- Stop if the panel has been repainted and you do not know its film build.
If the tree points to correctable swirls, a proper paint correction service can restore gloss safely. You can see what professional correction involves on our paint correction service page. You can explore auto body paint options for the affected panel.
How to Remove Swirl Marks from Car Paint Without Damaging the Finish
Swirl marks come from improper washing, drying, and polishing. Fixing them means removing the fine scratches with a controlled abrasive process, then protecting the finish so they do not return.
The steps:
- Wash the car with a two-bucket method and a clean mitt.
- Dry with a plush microfiber towel, not a bath towel.
- Clay the surface to remove contamination.
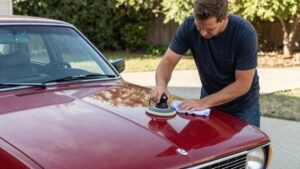
- Use a cutting compound with a foam pad on a dual-action polisher.
- Work in small sections at low speed.
- Follow with a finer polish to refine the finish.
- Wipe residue with clean microfibers.
- Apply paint protection to lock in the result.
A common mistake is polishing with too much pressure or a dirty pad. That creates new surface marring instead of removing it. Keep pads clean and swap them often.
Watch out: polishing over failing clear coat can lift flakes and make peeling worse. Confirm the defect is surface-level before you start.
For a full walkthrough, read our guide on how to remove swirl marks from car paint. Once the paint is corrected, a coating helps prevent swirls from coming back. Our roundup of the best ceramic coatings for swirl mark prevention covers the options.
Can Clear Coat Failure Be Repaired? Repair Options and Safety Limits
Clear coat failure generally cannot be polished away, and repainting or respraying the affected panel is typically the fix.
Here is what to expect:
- Light haze or early dullness: A professional may slow the decline with careful care, but the coating will not rebuild itself.
- Peeling or delamination: The panel needs sanding, surface preparation, and a fresh clear coat or full repaint.
- Widespread failure: A full respray is usually the most cost-effective path.
DIY correction has real safety limits. Aggressive compounding on failed coating removes material you cannot replace. It also risks burning through to the base coat, which turns a repair into a repaint.
Schedule a Professional Paint Inspection with Blue Ridge Mobile Detailing
Telling swirl marks from clear coat failure is hard to do alone, even with a good light.
Blue Ridge – Mobile Detailing brings professional paint correction and ceramic coating to your driveway, workplace, or fleet location. No drop-off. No shop schedule.
Our team offers:
- Multi-stage paint correction to restore depth and clarity
- Ceramic coating installation for long-term protection
- Mobile service across the Eastern Panhandle, Shenandoah Valley, and DMV regions
If you want to book a mobile paint correction or inspection visit, follow our step-by-step booking guide. Get started with Blue Ridge – Mobile Detailing and know exactly what your paint needs before you spend a dollar on correction.
Frequently Asked Questions
What does failing clear coat look like?
Failing clear coat shows as a cloudy, hazy patch that does not reflect light evenly, often with a rough or gritty texture. You may see peeling edges, yellowing or browning, and patchy dullness that stays after washing. Unlike swirl marks, which are fine circular scratches on the surface, clear coat failure means the top layer itself is breaking down. Check for these clear coat failure signs under direct sunlight or a bright inspection light.
How can you tell clear coat failure from swirl marks?
Swirl marks are fine circular scratches that appear as spiderwebbing under direct light but feel smooth to the touch. Clear coat failure looks like a cloudy haze, peeling, or patchy dullness and often feels rough or gritty. Use a bright light at a low angle: swirls show as tight circles, while failure shows as irregular dull patches. A baggie test with your fingertips can also reveal texture differences.
Can clear coat failure be repaired?
Yes, clear coat failure can be repaired, but the approach depends on severity. Early-stage failure with minor hazing may be improved by careful polishing, but once the clear coat peels or delaminates, repainting or respraying the affected panel is the only permanent fix. A professional inspection can determine whether correction is safe or if the panel needs refinishing.
Why do I still have swirls after buffing?
Swirls often remain after buffing because the abrasive compound or pad was too aggressive, the buffing cycle was too short, or the paint was not properly cleaned before polishing. Dirty towels and improper drying technique can also reintroduce surface marring. Use a two-bucket wash method, dry with a clean microfiber towel, and polish in good lighting to check your progress.
Paint defects rarely fix themselves, and guessing wrong costs money. Let our team inspect your finish under proper lighting and give you a straight answer on what is correctable and what is not. Get started with Blue Ridge – Mobile Detailing and protect the finish you paid for.