Table of Contents
- What Swirl Marks Actually Are and Why They Keep Coming Back
- Two-Bucket Wash and Decontamination: Stop Adding New Swirls
- Step-by-Step: How to Remove Swirl Marks From Car Paint
- Paint Correction vs Polishing: What’s the Real Difference?
- Best Pads for Paint Correction 2026: Cutting, Polishing, and Finishing
- How Long Does Paint Correction Take?
- Paint Thickness Safety and Vehicle-Specific Paint Hardness
- Preventing Swirl Marks After Correction: Sealant and Wash Habits
- Frequently Asked Questions
Last Updated: September 23, 2026
What Swirl Marks Actually Are and Why They Keep Coming Back
Swirl marks are fine circular scratches in your car’s clear coat that show up as spider-web patterns when sunlight or a bright light hits the paint. They are not dirt, and they are not something a basic wash will fix. This guide from Blue Ridge – Mobile Detailing explains how to remove swirl marks from car paint without damaging the finish.
Two-Bucket Wash and Decontamination: Stop Adding New Swirls
You cannot correct paint that you keep scratching. Before any polishing, remove every particle sitting on the surface. The two-bucket method is the baseline:
- Fill one bucket with soapy water and one with clean rinse water
- Add a grit guard to the bottom of each bucket
- Load a wash mitt, wash one panel, then rinse the mitt in the clean bucket
- Work top to bottom, never in circles
- Dry with a clean microfiber towel, blotting instead of dragging
Step-by-Step: How to Remove Swirl Marks From Car Paint
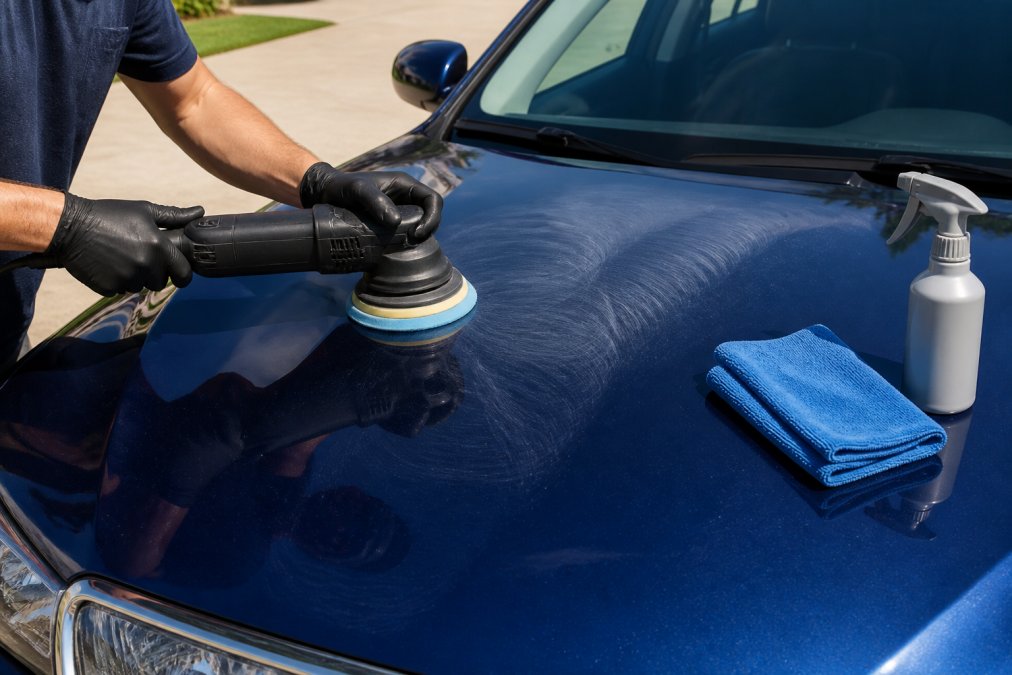
Removing swirl marks means leveling the clear coat so the surface reflects light evenly again. The process takes patience, the right pads, and a light touch.
Step 1: Inspect Paint Clarity and Measure Paint Depth
Wash the car and park it under direct sun or a bright inspection light. Look at the paint from several angles. Swirls, holograms, and marring all show up differently depending on the light. A paint depth gauge tells you how much clear coat you have to work with. This matters more than most guides admit.
Step 2: Hand Polishing vs. Machine Polishing
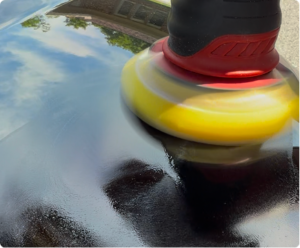
Hand polishing works for small areas and light marring, but it rarely removes deep swirls. A dual action polisher spins and oscillates at the same time, which spreads heat evenly and cuts consistently. That orbital motion is why a machine delivers uniform results while your hand cannot.
- Hand polishing: best for tight spots, trim edges, and spot fixes
- Machine polishing: best for full panels and heavy swirl coverage
- Rotary polishers: fast cutting, but easy to burn paint in untrained hands
Step 3: Pad Priming, Cross-Hatch Passes, and Buffing Residue
Prime the pad with a light mist of pad conditioner or polish before you start. A dry pad grabs and creates new scratches. Then work in a cross-hatch pattern: pass side to side, then up and down over the same area. This keeps the cut even. Wipe buffing residue with a clean microfiber towel, flipping to a fresh side often.
Paint Correction vs Polishing: What’s the Real Difference?
Paint correction and polishing are not the same job. Polishing is one step that refines the surface and boosts gloss. Paint correction is the full process of removing defects, and it often takes multiple stages: a cutting compound first, then a finishing polish. One removes damage. The other refines what is left. If your goal is to remove swirl marks from car paint, you are doing correction, not a quick polish.
|
Job |
What It Does |
Steps |
Best For |
|---|---|---|---|
|
Polishing |
Refines surface, adds gloss |
One |
Light marring, gloss boost |
|
Paint correction |
Removes defects, levels paint |
Two or more |
Swirls, scratches, oxidation |
Best Pads for Paint Correction 2026: Cutting, Polishing, and Finishing
Pad choice decides how much paint you remove, and it works in tandem with the abrasive in your polish. Get either wrong and you either leave swirls behind or cut too deep. Match the pad to the stage, and match the polish to the pad.
How pads and abrasives are graded
Polishes and compounds are graded on a cut scale, usually expressed as a number or a coarse-to-fine label. A heavy cutting compound paired with a firm microfiber pad removes the most material. A finishing polish paired with a soft foam pad removes almost none, it only refines. The rule of thumb most practitioners follow: pick the least aggressive pad-and-polish combo that removes the defect, then step down to refine.
- Cutting pads: firm open-cell foam or short-nap microfiber, used with a cutting compound to remove heavy swirls and deeper scratches
- Polishing pads: medium-density foam, used with a medium-cut polish to refine and remove compounding haze
- Finishing pads: soft, fine-cell foam, used with a finishing polish for maximum gloss and to burnish the surface
- Wool pads: aggressive cut for severe oxidation or gel-coat, but they leave their own marring that must be refined out
Foam cell structure matters more than color
Pad color is a marketing convention, not a standard. What actually controls cut is cell structure and density. Open-cell foam lets abrasives and removed paint escape the pad face, which keeps the cut consistent and reduces heat buildup. Closed-cell foam traps material against the surface, which cuts harder but loads up faster and runs hotter.
Pad diameter and machine speed
A 5-inch pad on a 5-inch backing plate spins faster at the edge than a 6-inch pad on the same machine, which concentrates cut and heat. Smaller pads are easier to control on curves, bumpers, and pillars. Larger pads cover a panel faster but stall more easily on a dual action polisher, which reduces their effective cut.
A common mistake
Jumping straight to a cutting pad and compound on a car that only needs a light polish. That removes clear coat you did not need to remove. Start with the least aggressive option that gets the result, inspect under a bright light, and step up only if the defect survives.
How Long Does Paint Correction Take?
A single-stage polish on a well-kept car can take two to four hours. Multi-stage correction on a swirled or oxidized finish often runs a full day or more. Size, paint hardness, and defect severity all change the timeline. Larger vehicles and harder clears take longer. So does working panel by panel with proper inspection between passes.
Paint Thickness Safety and Vehicle-Specific Paint Hardness
This is the part most guides skip, and it is the difference between a corrected car and a repainted one. Not all clear coats are equal, and you cannot correct paint you do not have.
Reading a paint depth gauge
A paint depth gauge measures total film thickness, primer, base coat, and clear coat combined, in mils (thousandths of an inch) or microns. Most factory finishes land in a fairly narrow range, and most of that thickness is not clear coat. Clear coat is typically the thinnest layer, often a small fraction of the total reading.
What a safe working margin looks like
There is no universal number, because every manufacturer builds to a different spec. The practical rule most professionals follow: if a panel reads low or shows signs of prior wet-sanding or heavy compounding, do not chase every defect. Correct what is safe, leave the rest, and accept a small amount of remaining marring rather than risk burning through to the base coat.
Vehicle-specific paint hardness
Clear coat hardness varies by manufacturer and even by model year. Some finishes are soft and mar easily but correct quickly with a light polish. Others are hard, resist scratching in daily use, and fight you through every pass, they need a more aggressive pad and compound to achieve the same result. This is why a combo that works on one car can leave haze or do nothing on another.
How hardness changes your plan
- Soft paint: use a finishing or polishing pad with a light polish. Aggressive combos cut fast and can leave hazing that is hard to refine.
- Hard paint: you may need a cutting pad and compound to remove the same defect, then a polishing step to refine.
- Unknown paint: test a small hidden panel with your least aggressive combo first, inspect under a bright light, and step up only if needed.
Preventing Swirl Marks After Correction: Sealant and Wash Habits
Correction is wasted if your wash habits put the swirls right back. Protect the finish and change how you clean it.
- Apply a paint sealant or ceramic coating after correction to add a protective layer
- Use the two-bucket method every wash
- Never use a brushed car wash
- Dry with clean microfiber only
- Keep a dedicated wash mitt for paint and one for wheels
Frequently Asked Questions
What is the best swirl remover for cars?
There is no single best swirl remover. A finishing polish paired with a soft foam polishing pad handles light swirl marks, while a cutting compound with a microfiber cutting pad is needed for deeper marring. Match the abrasive polish to the paint hardness and defect depth, and always start with the least aggressive combination before stepping up.
How to remove swirl marks from car at home?
Wash and decontaminate the paint first with a two-bucket method and a clay bar. Then polish by hand with a microfiber applicator for small areas, or use a dual action polisher with a polishing pad for full panels. Work in a shaded area, wipe residue with a clean microfiber towel, and apply a paint sealant afterward to protect the finish.
Can swirl marks be buffed out?
Yes. Swirl marks sit in the clear coat and can be leveled out through buffing with an abrasive polish. The key is using a dual action polisher with the right pad and compound for the paint’s hardness, and checking paint depth so you do not remove too much clear coat. Deep scratches that catch a fingernail may need professional paint correction.
Is it better to remove swirl marks by hand or machine?
Machine polishing with a dual action polisher removes swirl marks faster and more evenly than hand polishing. Hand polishing works for small spots or tight areas but rarely corrects an entire panel. For heavy swirls on a full vehicle, a machine with a cutting pad and compound followed by a finishing polish gives the best gloss enhancement.
Swirl marks return the moment your wash routine slips. Protecting corrected paint takes the right products and consistent habits, and that is where professional help pays off. Blue Ridge – Mobile Detailing brings multi-stage paint correction, certified ceramic coating installation, and full mobile service to your driveway, dock, or hangar. Get started with Blue Ridge – Mobile Detailing and restore the depth and clarity your paint was built to show.